

INTRODUCTION TO GIT
1. SOURCE CODE MANAGEMENT (SCM)
It is a Practice to do work. It is used to track modifications to a source code Repository, also track the running history of changes to a code base & help resolve conflicts.
Source code management is divided into two parts:
Centralised Version Control System
It is a Repository(remote server) where developers used to commit their code. Eg – SVN TOOL
Disadvantages of CVCS:
Without the internet/network, nothing can be performed.
If the Central server fails you will lose all your data.
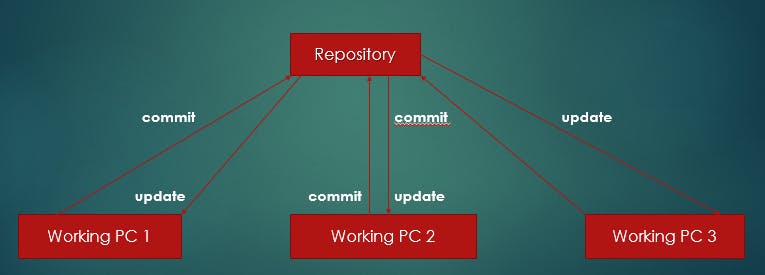
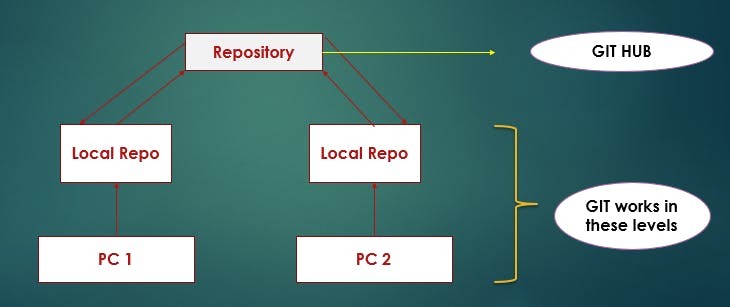
Distributed version Control System
Developers will share the code first at the Local Repository as a first copy and from there we can PUSH/PULL the code to the Repository (Remote server).
Eg: GIT
VERSION CONTROL SYSTEM:
It records all the changes made to a file or set of data.
2. STAGES OF GIT:
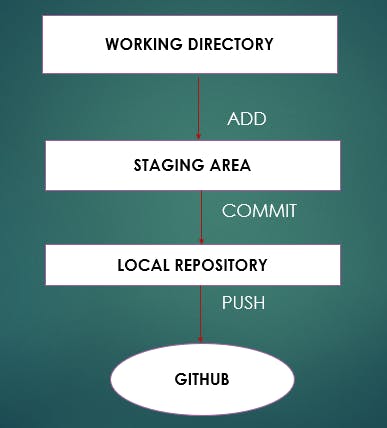
Working Directory/working space: The place where I will write the code, and do editing or modification.
Staging Area: After writing the code we add it to the staging area from the working directory
Local Repository: From the staging area we commit/save(come at the master branch) it to the local repo and here the code will get the snapshot where the code is saved and can preview.
After the process, we PUSH our code to Git-hub(which is the central repo/storage)
And the next developer will PULL the code to his Linux Machine from the Git-hub and the code will come to his working directory, and then he will update/add new code and then he will again PUSH the code to Git-hub and get saved.
Note – Every code will have a commit ID/version.
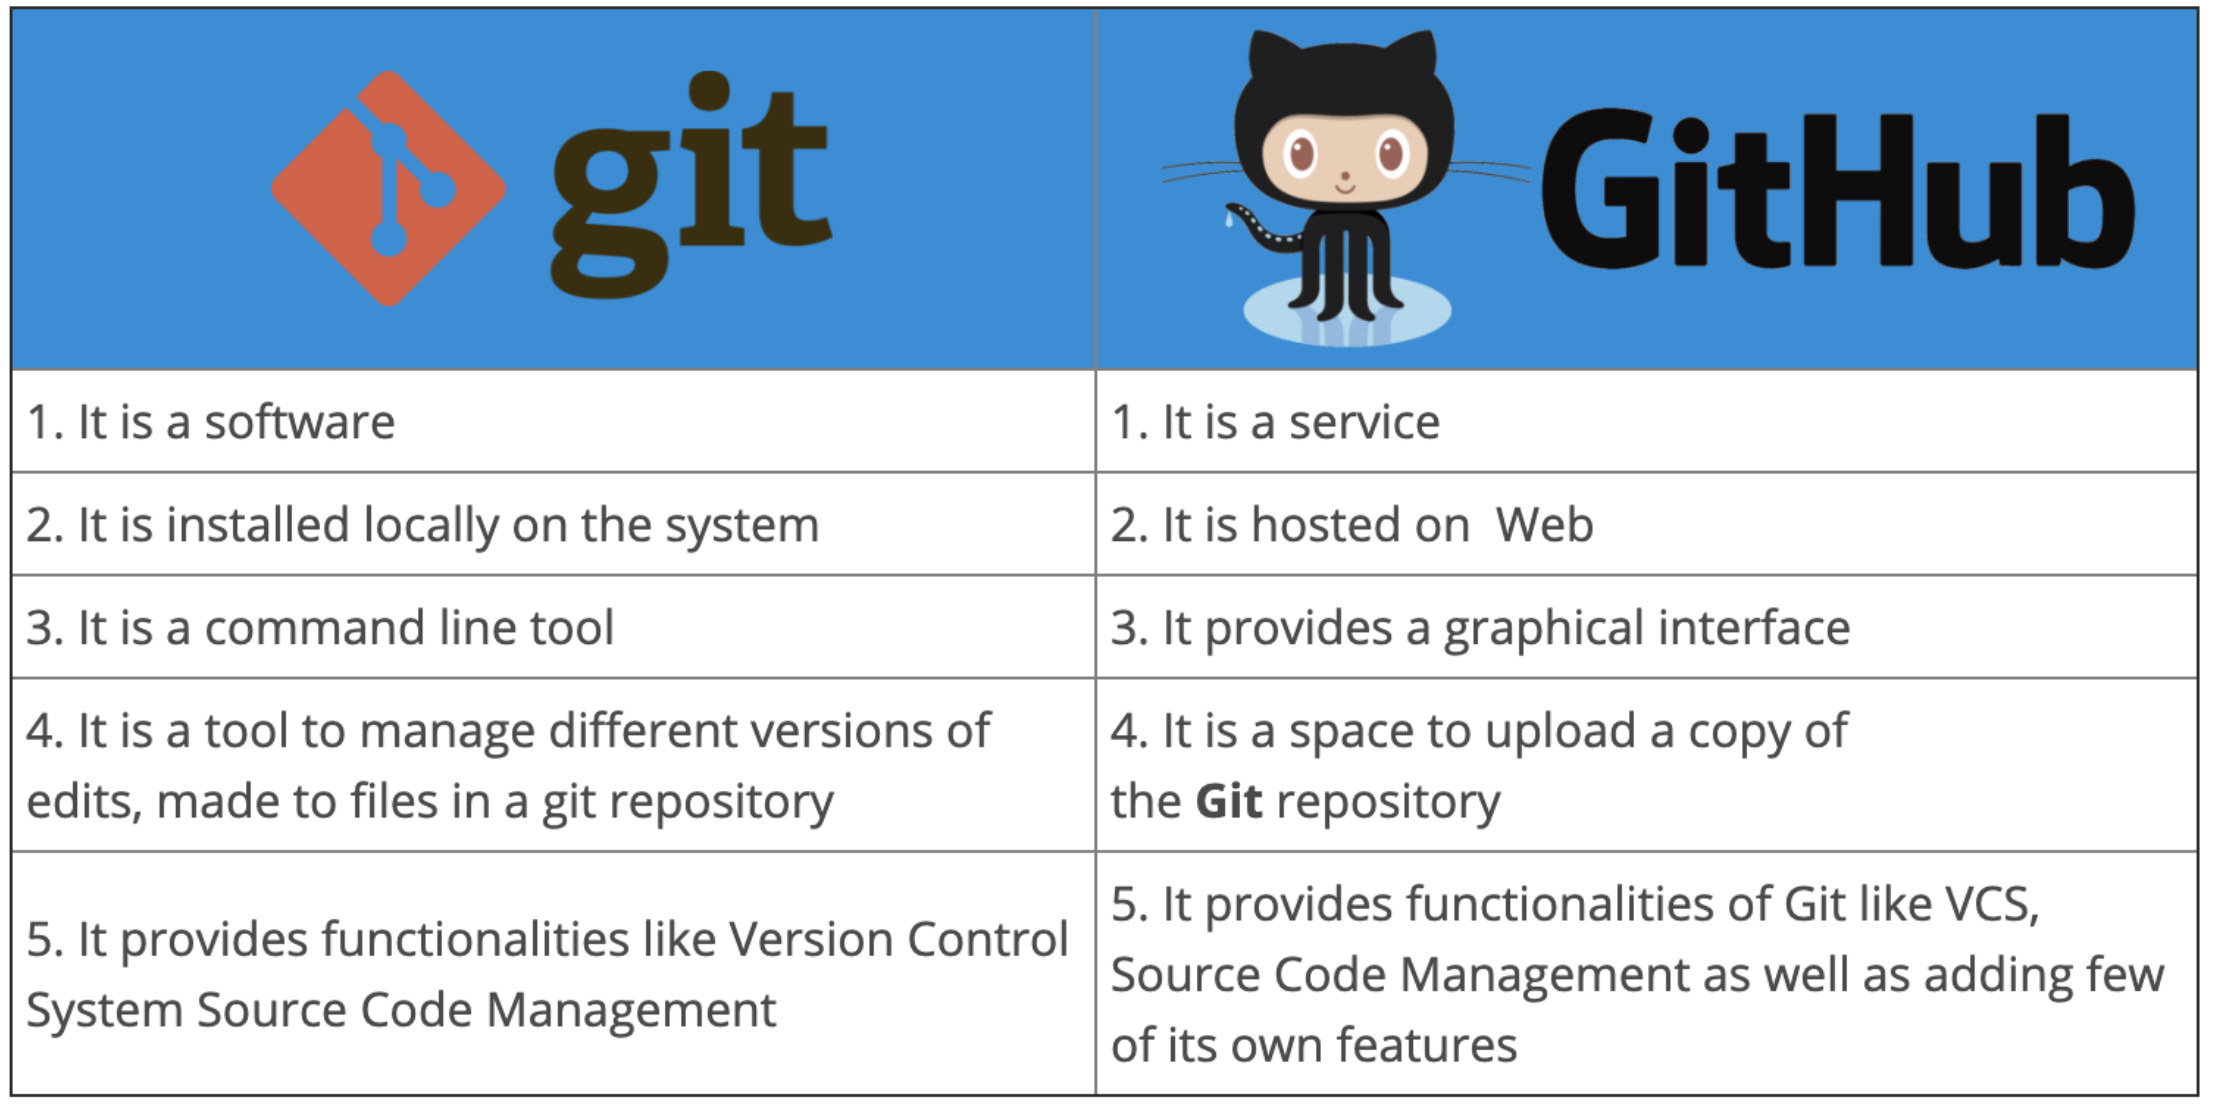
3. Difference between Git and Git-hub?
4. What is Commit ID/version ID/ version?
→ It is a reference to identify each change. Even to identify who changed the file.
5. What are Tags?
→ Tags assign a meaningful full name with a specific version in the repository. Once a Tag is created for a particular Save, even if you create a new commit, it will not be updated.
6. What is Snapshot?
→ It represents some data of a particular time. It is always incremental, it stores the changes (appended data) only, not the entire data.
7. What is PUSH?
→ Push operations copies changes from local repo instances to a remote or central repo. This is used to store the changes permanently in the Git repository.
8. What is PULL?
→ PULL operation copies the changes from a remote repo to the local repo/machine. The PULL operation is used for synchronization between two repo.
9. Advantages of GIT?
→ Free and Open source.
* Fast and small
* Security – Git uses a common cryptographic hash function called secure hash function(SHA-1) to name & identify objects within its database.
* No need for powerful hardware.
* Easier Branching.
10. How to use GIT & Create GIT-HUB Account :
- Create first AWS acc -> Create two EC-2 Instance (Linux) -> For example 1 in Mumbai and 1 in Singapore and get access through putty & allow SSH & HTTP port.
After logging into LINUX:
Log in as ec2 – user
sudo apt-get update -y ( It will update all Ubuntu files)
sudo apt-get install git –y (It will download/install Git)
which git ( to check it's installed)
git --version (version series)
git config --global user.name “Subhankar” (it will add name)
Git config --global user.email “subh@123gmail.com” (It will add email)
git config --list (To check what is present in the list)
11. PUSH COMMANDS :
Login into Mumbai EC-2 Instance.
Create one directory and go inside it.( cd <directory name> )
git init (initialize, it will start a new Repo). ( /home/ec2-user/<directory name>/.git )
Touch myfile/cat > <filename>. ( Then write the code inside )
git status ( list all the files that need's to be committed)(It will show the untrack file, not committed)
git add . (add a file from WS to Stagging area).
git status (list all the files that have to be committed).
git commit –m “My first commit from Mumbai”//message (This command records/snapshots the file permanently in the version history).
git log ( displays all the commits in a repository history). // It also shows the 40-digit alpha-numeric commit ID, author name, data, & the message
git show <commit.ID paste> (It will show the code which is written after committing )
git remote add origin <Git-hub URL> // to push to the remote server and add it to the central Repo
git push –u origin master (to push it to the Git-hub)
Then add user name & password of Git-hub.
12. PULL COMMANDS :
Now go to Singapore EC2 user.
Create a Directory.
git init
git remote add origin <Git-hub URL>
git pull –u origin master (It will pull all code from the central repo).
git log (displays all the commits). // (what the previous developer had committed)
git show <commit-ID
git status
cat >>Directory name
git add.
git commit –m “Singapore update 1”
git status
git log
git push origin master
13. What is a Branch?
→ * We get a default branch which is Master Branch in our Local repo.
* Each task has a separate branch.
* We can create one branch based on another branch.
* Changes are personal to that particular branch.
* File created in Workspace will be visible in any of the branch workspaces until you commit.
Once you commit, then the files belong to that Particular Branch.
14. Branching commands:
git branch ( To see list of available branches )
git branch <branch-name> ( To create a branch )
git checkout <to which branch you want to go> ( It will take you to that branch)
OR
git checkout -b <new branch name> ( it will create a new branch and take you there )